Email Templates
Learn how to create smart email templates that adapt to every lead
📧 Mastering Email Templates: The Heart of Outreach
Now that your agent knows who you are (Profile) and has your brochures (Knowledge Base), it's time to teach it how to speak to your customers.
In the Email Template Management section, you don't just write static emails. You create "Smart Blueprints" that our AI adapts for every single lead.
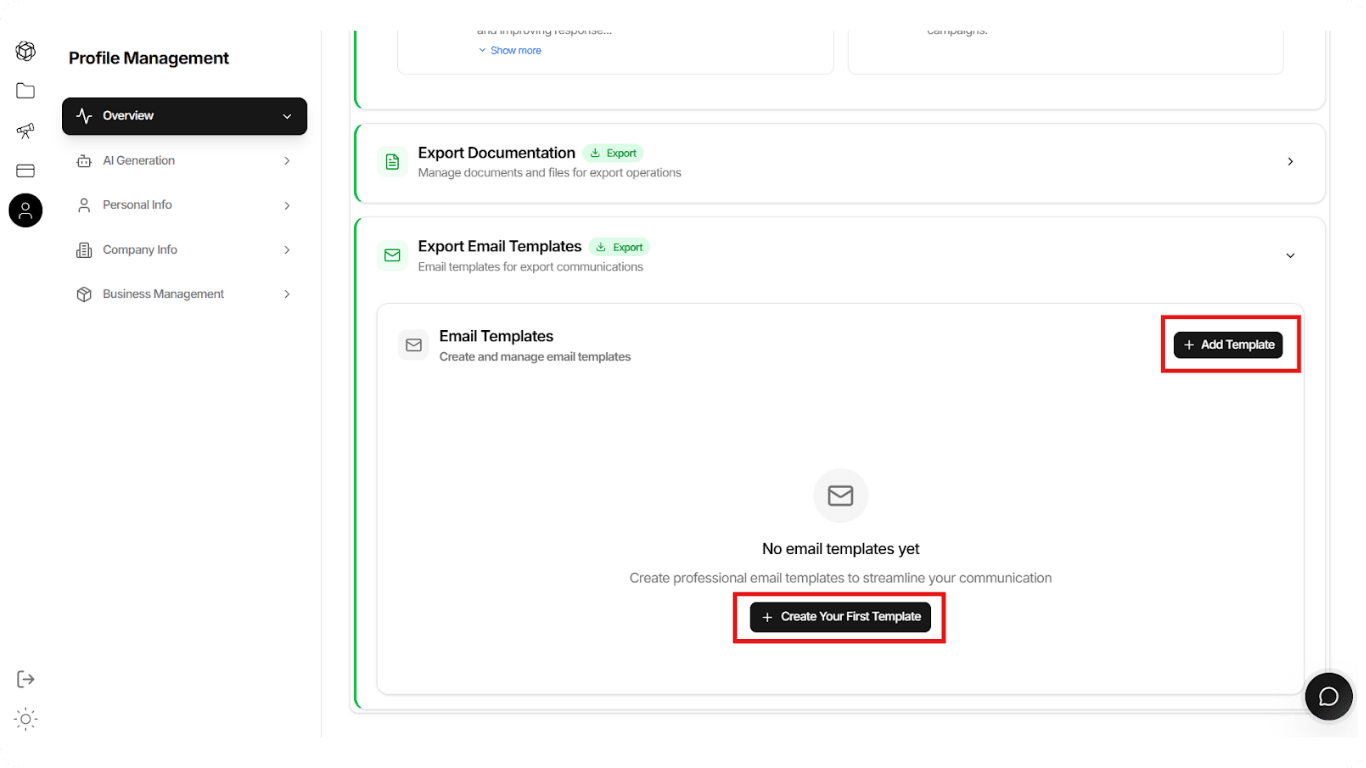
Step 1: Access the Template Hub
Navigation: Locate the Export Email Templates section on your dashboard.
- If you are new, you will see a clean dashboard waiting for your first strategy.
- Click + Add Template or Create Your First Template to get started.
Step 2: Let AI Write the First Draft
Writing sales emails is hard. Let EximGPT do it for you. Inside the Create New Template screen, you will see the AI Assistant panel at the top.
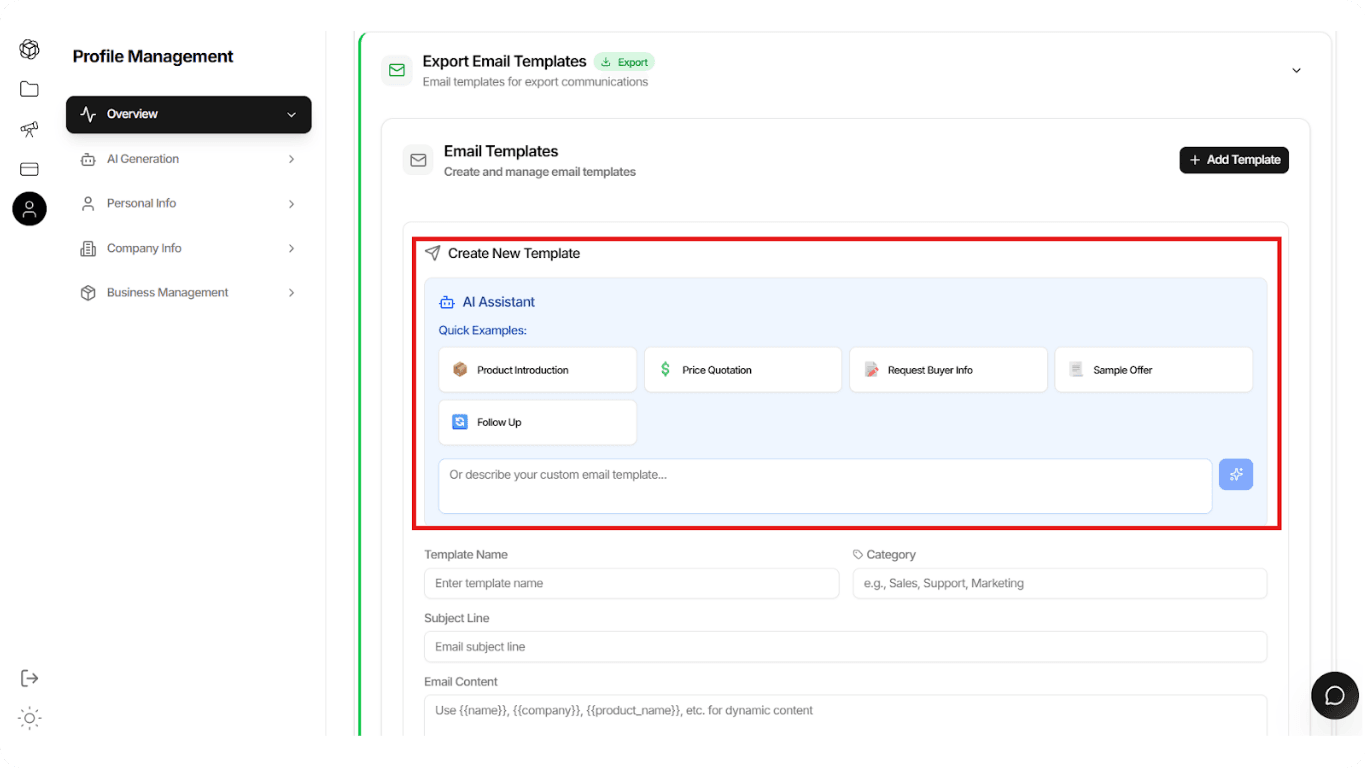
Option A: Use Quick Examples
Select one of the pre-built scenarios to generate an instant draft:
- 📦 Product Introduction: Best for cold outreach to new leads.
- 💲 Price Quotation: Formal pricing requests.
- 🤝 Follow Up: Gentle reminders for unresponsive leads.
- 📄 Sample Offer: Proposing product samples.
Option B: Custom AI Instructions
Have a specific strategy? Type your instruction in the text box:
Example:
Write a polite email to a procurement manager in Germany introducing our organic coffee. Keep it professional but friendly, and mention our ISO certification.- Click the AI Sparkle Button ✨
- Watch the AI generate the Subject Line and Body content instantly.
💡 Pro Tip
You can combine both approaches: Start with a Quick Example, then add Custom AI Instructions to refine it further.
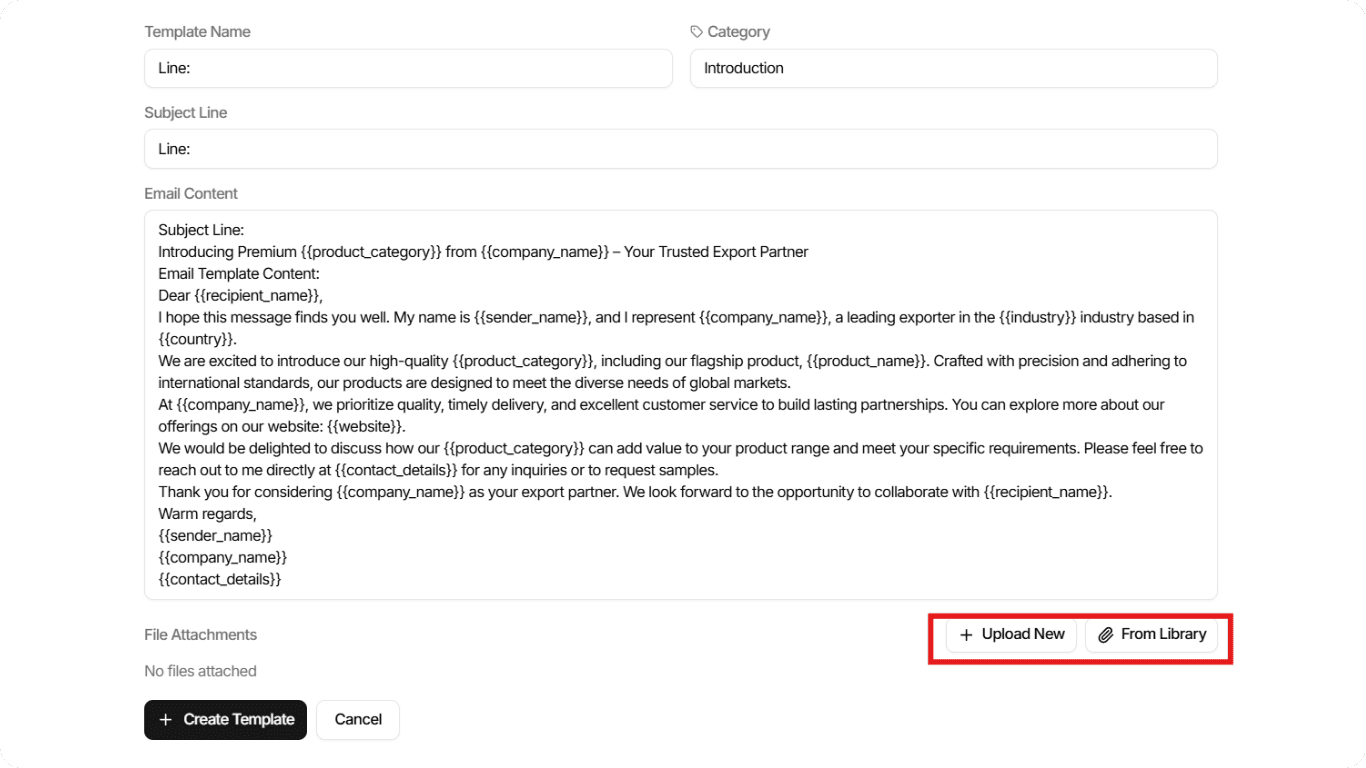
Step 3: Refine & Attach
Once the AI generates the draft, you have full control to polish it.
Template Name & Category
Label your template (e.g., "Cold Outreach - EU Market") so you can find it easily later.
Dynamic Variables
You will notice placeholders like {{name}} or {{company}}.
⚠️ Important
Do not remove these placeholders! This is where the AI inserts the recipient's specific details during campaign execution.
Common Variables:
{{name}}- Recipient's name{{company}}- Company name{{position}}- Job title{{country}}- Location{{industry}}- Business sector
Attachments
You have two options for adding files:
- From Library: Click this to instantly attach the brochures or price lists you uploaded in the previous Knowledge Base step.
- + Upload New: Use this for specific files that are only needed for this template.
Files attached from the Knowledge Base can be reused across multiple templates, while uploaded files are template-specific.
💡 How the "Smart Personalization" Works
This is where EximGPT shines. When you eventually hit "Send" on a campaign using this template, our AI performs a "Double-Sided Analysis":
Sender Context (You)
It pulls your USP and product details from the Profile you set up earlier.
Receiver Context (Them)
It analyzes the lead's business type and location.
The Result?
Even though you are using one template, every email sent looks unique. The AI might:
- Emphasize "profit margins" for a retailer
- Emphasize "quality consistency" for a manufacturer
All based on the data available.
✅ Best Practice
The more detailed your Profile and Product descriptions are (from Step 1), the smarter these personalized adaptations become. Always complete your profile setup first!